Here, you will find some solutions that will help you fix the Wi-Fi issue on the MacBook. Sometimes, in a new place, we have to connect our MacBook to a local Wi-Fi to access the Internet.
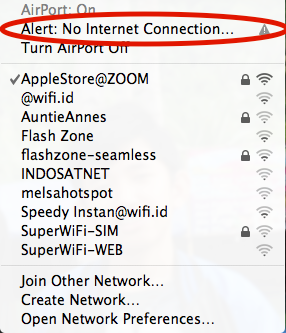
Sometimes the Wi-Fi may already be connected, but we still cannot access the Internet. In this case, check your MacBook’s Wi-Fi icon first on the menu bar.
If you see the exclamation mark ( ! ) on the Wi-Fi icon in the menu bar, as you can see in the picture above, it means that there’s a network issue. Click on the Wi-Fi icon and you will probably see the following drop down menu.
How to Fix Common Connection Wi-Fi Issue: Self-assigned IP on MacBook
Many things can cause the no internet connection issue, one of which is the self-assigned IP issue. If you are using Mac OS X 10.5 or later and facing this issue, try the following.
Check your Network Preferences
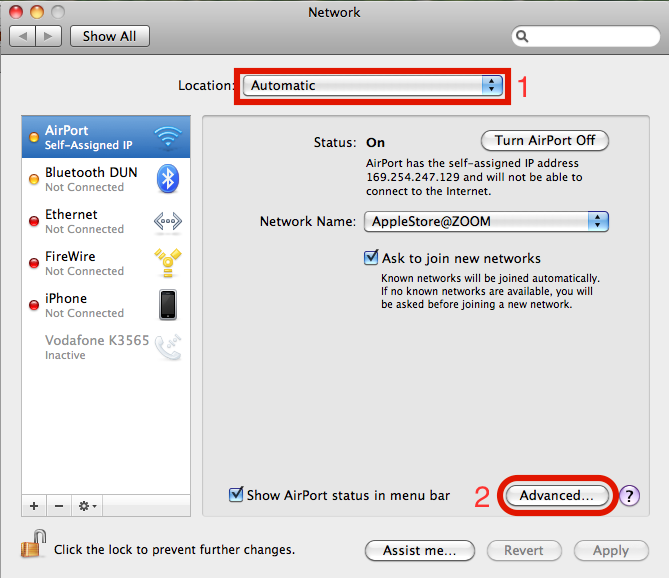
To start, go to the Apple menu > System preferences > Network.
In this part, you have to ensure that Location (1) is on the Automatic option, as you see in the picture below, then click Advanced (2).
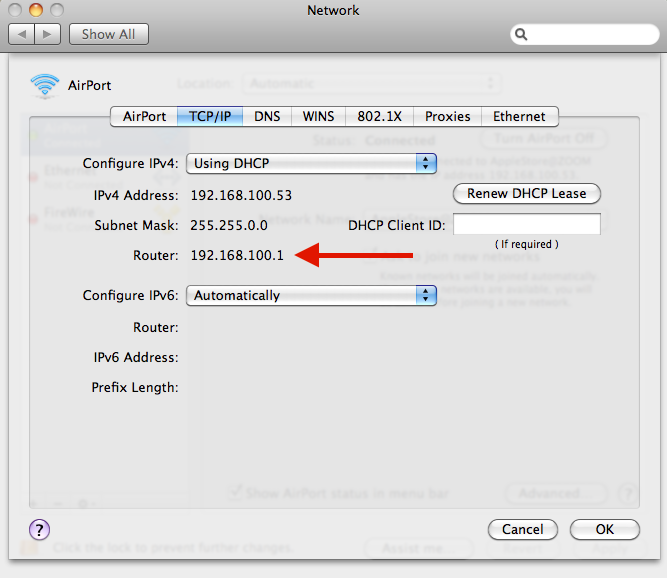
After you click Advanced (2), a new window will appear, as shown in the picture below. Click on the TCP/IP tab to view this window.
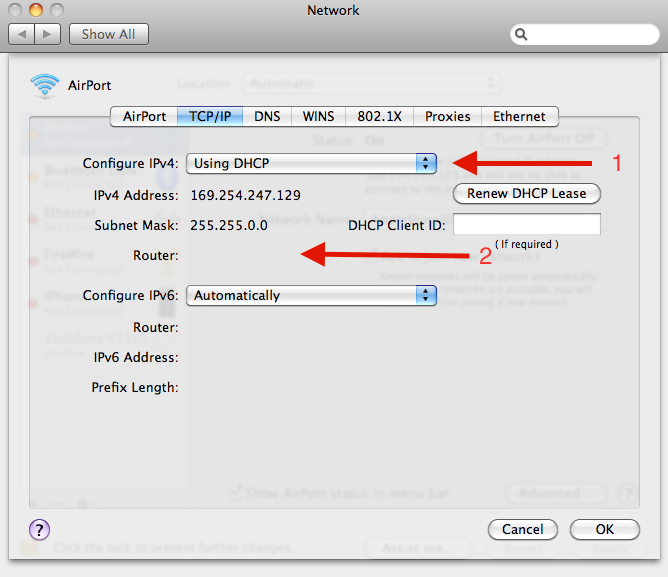
You should see two things: Configure IPv4 (1) and Router (2). If Configure IPv4 has been set to Using DHCP and the Router field is empty, then try the following steps to resolve the issue.
Reset Network Configuration
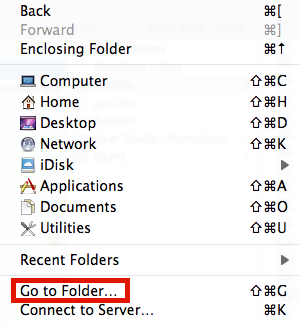
- Click on the Finder Icon, then in the Menu Bar Click Go > Go to Folder
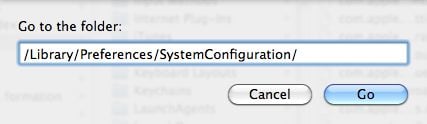
- After you click Go to Folder, type: /Library/Preferences/SystemConfiguration/
Note: This will reset all your network configurations. Feel free to proceed if you have no problem losing your network configuration.
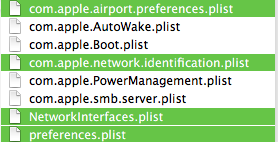
- Delete the files highlighted in the picture below. You will be asked for your admin password.
- Restart your MacBook. After you log in, try to connect to the same Wi-Fi. Check and make sure that Router IP fills the Router in the Advanced window.
Renew DHCP Lease
Here's what you need to do:
- From the menu bar, click on the Apple logo
- Next, head over to System Preferences
- Go to Network Settings
- Choose your Wi-Fi or Ethernet
- Select Advanced and go to the TCP/IP tab
- Find the iPv4 Address line, and click on Renew DHCP lease right next to it
- Finally, click OK.
Create a brand new network location
If the previous suggestions didn't make any changes, try the following:
- From the menu bar, click on the Apple logo
- Next, head over to System Preferences
- Go to Network Settings
- Click on the drop-down menu right next to Location
- Next, click on Edit Locations
- Click on "+"
- Enter the name of the location
- Click Done.
- Next, select your Ethernet or Wi-Fi
- Click Advanced and then choose the TCP/IP tab
- Find the iPv4 Address line, and click on Renew DHCP lease right next to it
- Finally, click OK.
Reset the firewall
Still nothing? It's time to reset the firewall. Here's how:
- Open Finder
- Click Go > Go to Folder
- When the pop-up window shows up, enter the following: /Macintosh HD/Library/Preferences/
- Find the file: com.apple.alf.plist
- Delete that file
- Restart your Mac.
Set the service order
Follow the steps below:
- Click on the Apple logo and then head over to System Preferences
- Go to Network Settings
- Find the gear button at the bottom and click on it
- Click on the option Set the service order
- Place the services at the top of the list by dragging them there.
Changing DNS servers
Changing DNS servers helped many users to get rid of the problem. Give it a try:
- From the menu bar, click on the Apple logo
- Next, head over to System Preferences
- Go to Network Settings
- Choose your Wi-Fi or Ethernet
- Select Advanced
- Click on the DNS tab
- Next, click on "+"
- Add the following numbers:
- 8.8.8.8
- 8.8.4.4
- 1.1.1.1
- 9.9.9.9
- Finally, click OK.
If you have tried all these suggestions but are still facing the same issue, please contact Apple Support.