If you are subscribed to Apple Music and have a Windows 10 PC, you can listen to your favorite music on iTunes. You need to download iTunes from the Microsoft Store, install it, sign in with your Apple ID, and you are ready to go.
You can manage various things on iTunes, including what you want to be notified about. Here, in this article, we will share the steps for that. Without further ado, let’s see how to manage Apple Music notifications on iTunes on Windows 10.
How to manage Apple Music notifications on iTunes on Windows 10
Apple Music can send notifications through iTunes, but you may disable this option or leave notifications for specific things only. Here’s how to do that:
- Open iTunes on your Windows 10 PC
- Next, click on Account > Apple Music
- Now click on Notifications
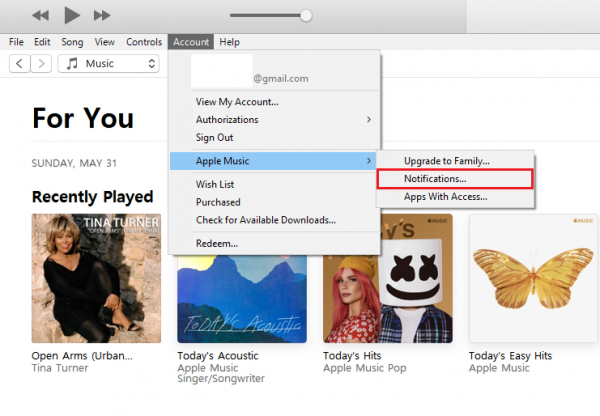
- If you don’t see the “Account” option, you are not signed in. So, sign in using your Apple ID, and the options will appear.
- When you click on Notifications, decide if you want to leave things as set by default or if you want to change something.
- You will be notified about your friends’ activities, favorite artists, and shows.
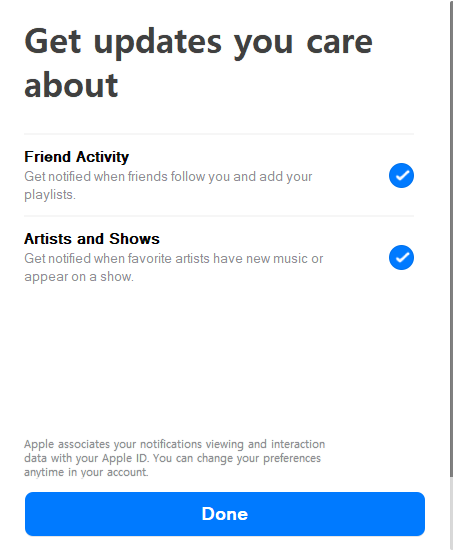
When you manage the options the way you want, click Done.
This is how you can manage notifications. If you like, leave them as they are or turn them off. It’s up to you.